- Empty cardboard box*
- Stanley Knife or similar cutting device
- White tissue paper ($2 approx)
- Large piece of Postercard ($3 approx)
- Sticky tape
Seriously, this is all you need.
How to build it? Read on...
*The Cardboard Box is the most important element in building this studio. If it's too big, the spot lights shining into it will have a tough job providing enough lighting your item (that's what happens to me). If it's too small, you run the risk of not being able to avoid hitting the sides with the item or being able to avoid the sides by cropping them out. My rule of thumb is 'bigger than a nappy box, but smaller than a moving box, and try to get one that is square or a deep rectangle to ensure your items fit inside with enough surrounding space. Don't have a box around the house? Pop down to the local hardware store/supermarket and grab a free one, or if you know someone that's just moved a small moving box is ideal.
Now that you've got your box, it's time to cut it to size. You want to cut into four of the six sides, leaving two untouched. Three will have windows and the fourth will have an entire side cut out.
Cut close to the edge, but leave a good inch or so to keep a bit of strength in the sides, as the thinner the sides, the more flimsy it will be. Cut the entire wall out of one side which will be the front of the light studio. I left a front flap on mine but there's really no need to do that. In fact if you leave the two opposing flaps on and turn it on its side, they will act to control the amount of light coming in. I didn't do this, simply because I forgot and had cut the flaps off before I remembered I was going to leave them on, nevermind, no biggie.
Grab your white tissue paper and cover the three sides with windows leaving the entire wall you've cut out uncovered (this is where the items are inserted in and out, so you need that whole wall free.)
With the walls removed, it makes the box quite flimsy (see my photo) so try to be pretty gentle sticking the tissue paper on. It doesn't have to look overly professional, try to get the tissue paper neat and tidy, but as long as the spotlight(s) can still shine through the tissue paper, it'll be fine.
I accidentally stuck my finger through the tissue paper (if you're particularly clumsy use tracing paper as it's tougher), but it's simple enough to stick up the hole and carry on, no harm done.
Once you've covered the three windows up with tissue paper, you need to stick the backing paper up to create an "infinity sweep" (endless background). A large sheet of white poster card is ideal and you can pick them up from your local Officeworks, or craft store. Sometimes cheap shops sell large sheets of cards too (along with tissue paper). The one thing you DON'T want to do is stick two sheets together. The background needs to be seamless. You can never hide the seam in photos (without photoshop that is, but why bother going to that trouble every time you take a photo) and it will ruin the look. If you're using the card underneath just to hold up another sheet of fabric/card then it's ok to have a seam as the card will not be seen.
The beauty of this light studio is that you can change backgrounds simply by switching the card to another colour or by draping fabric. If you want to be tricky, try sticking a couple of crocodile clips up in the top corners inside the box which can hold up a sheet of fabric if you want to experiment with different backgrounds. This is especially good if you're photographing white or off-white items which will otherwise look washed out.
Setting up your spotlights is the final thing to do before taking your photographs. You'll need to play around with this to work out the best set up for you, but as a starting point try this: set the box on a table next to a window with indirect light (natural light) coming in. Then situate the box so you have a light from the ceiling shine in through the top window (if you don't have a spotlight directed through the top as I don't), and a spotlight shining through the other side. The lights I've used below are not ideal, but they are ok for my purposes and I didn't have to go and buy some specially for it (they're from the spare room!). A white light spotlight would be better, these globes are too warm but nevermind.
And there you have it! Start taking photos straight away. You'll be blown away at the difference this little cheap technique makes to your photos.
When selling items it's best to have a range of photos of the product from different angles. Experiment with positioning yourself and the item, add a different background, put another everyday in the picture to add size perspective such coins or bank notes, or lie a ruler in there alongside the item to indicate the size of the item. Use your imagination!
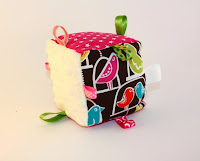
Find yourself some photo editing software and crop the sides, then play with the colours, contrast and brightness to get it just right. Looks pretty professional huh! (normally I would crop this even closer, but for the purposes of this tutorial, you get the idea). You can even buy this cube in my Etsy shop...


No comments:
Post a Comment